Solar Power Management Module
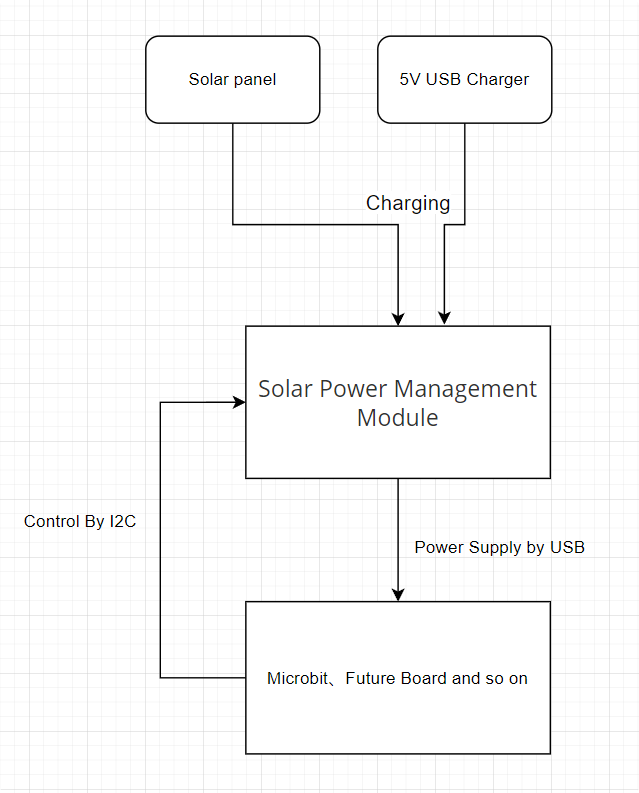
The Solar Power Management Module is a module with an I2C bus interface. It is different from traditional solar modules on the market; it is a true "management module." It does more than just receive solar energy and convert light energy into electrical energy. With an onboard 18650 battery, it can store electrical energy. The external mainboard can also communicate with the solar module via the I2C protocol, allowing for the setting of the working duration and sleep duration of the solar module's power output. This gives the mainboard, which does not have a sleep function, a "sleep" capability and significantly reduces the programming threshold for users.
Parameters
| Dimension | 80 x 40 x 32.5 mm |
|---|---|
| Weight | 84.6 g (module) / 646g (module + solar panel) |
| Signal | I2C |
| Battery Capacity | 2000mAh |
| Solar Charging | Only applicable for 6V solar panels, charging current (250mAh at noon) |
| USB Charging | 5V 1A |
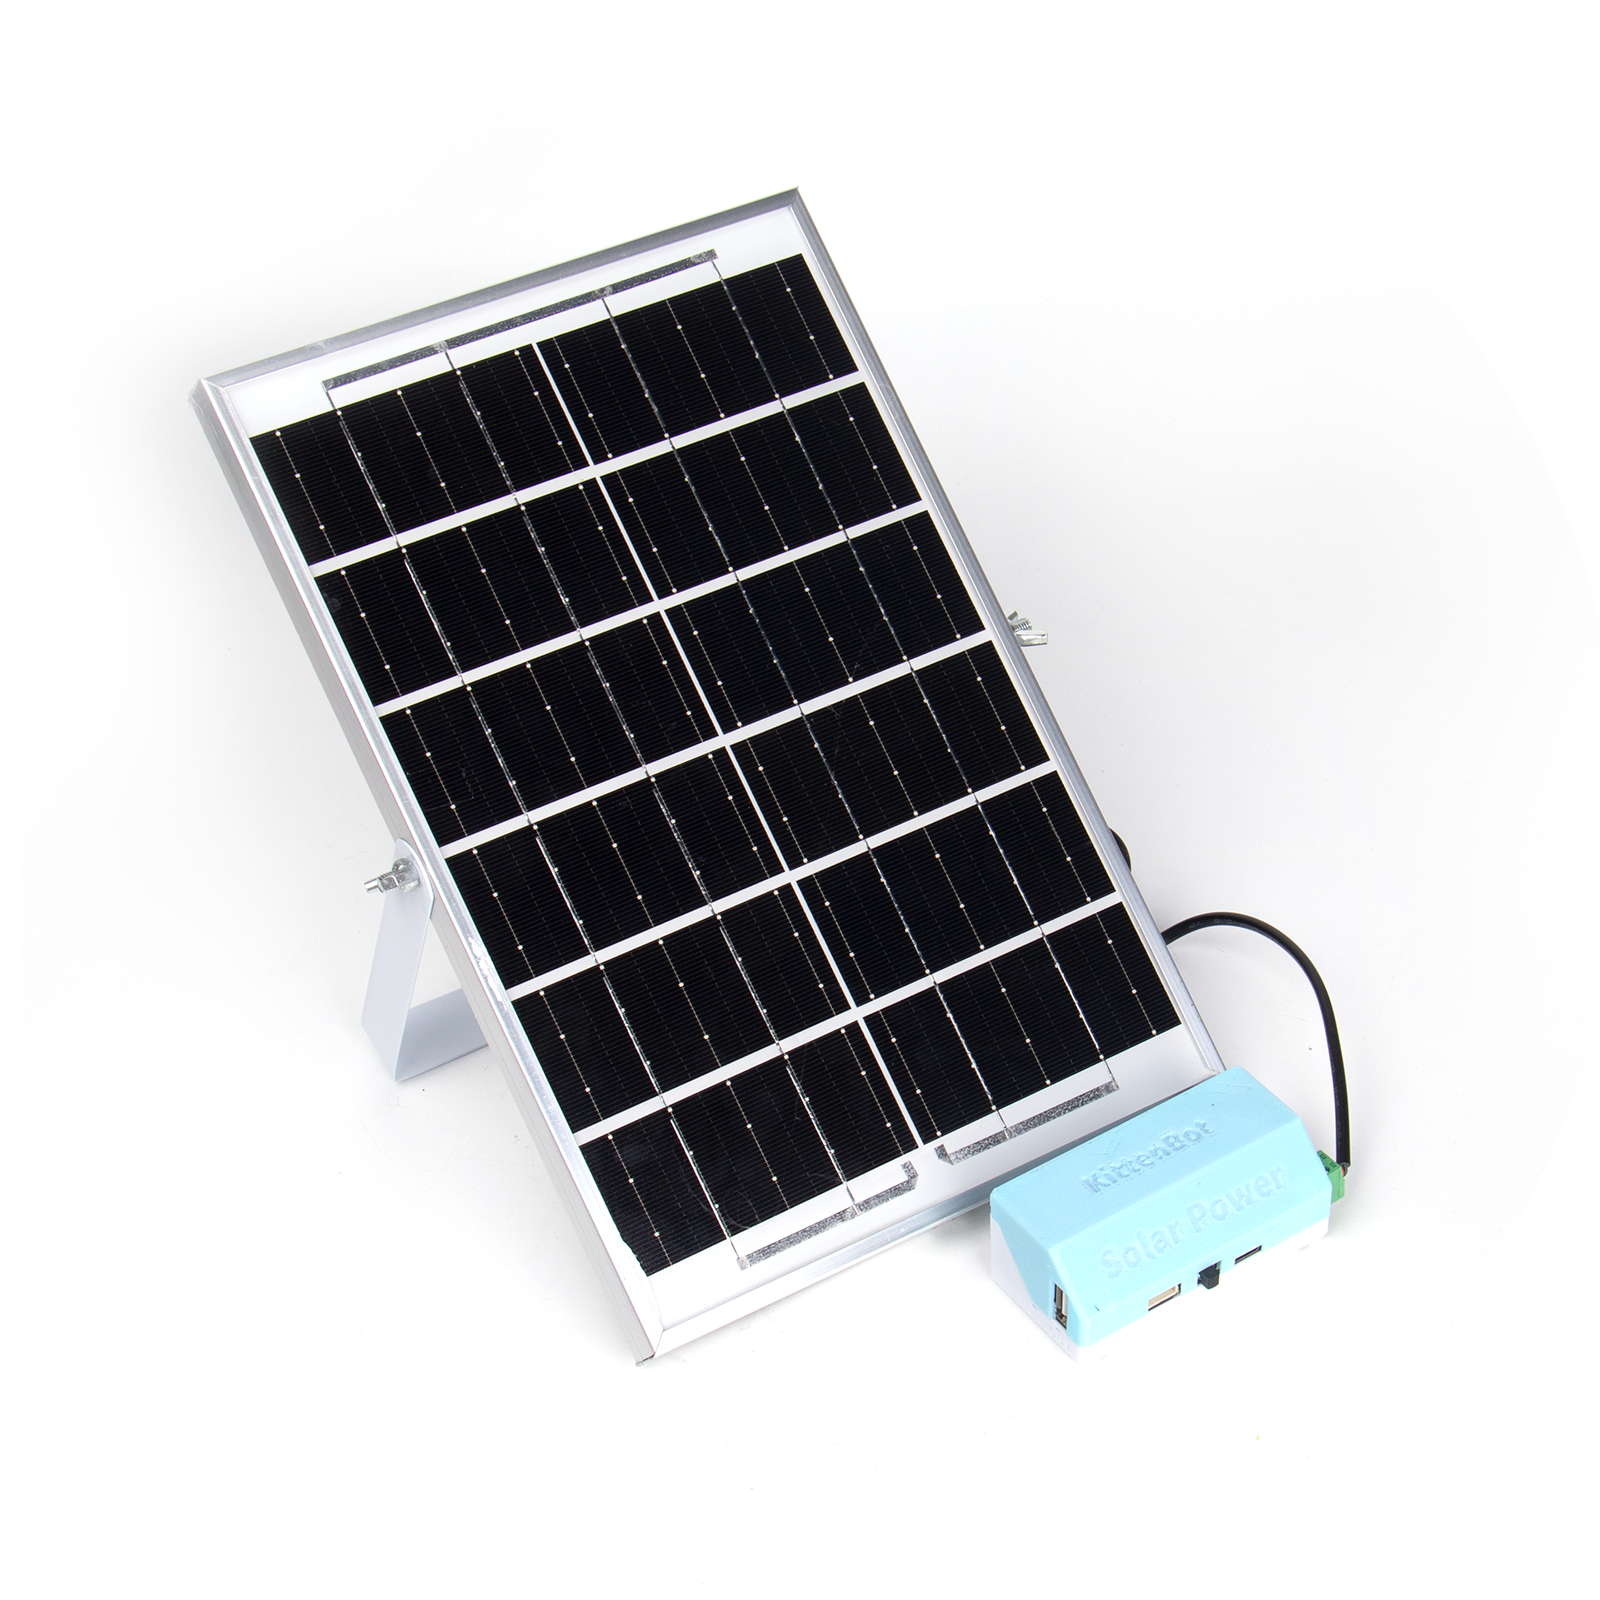
| Solar Panel | 6V 6W monocrystalline silicon |
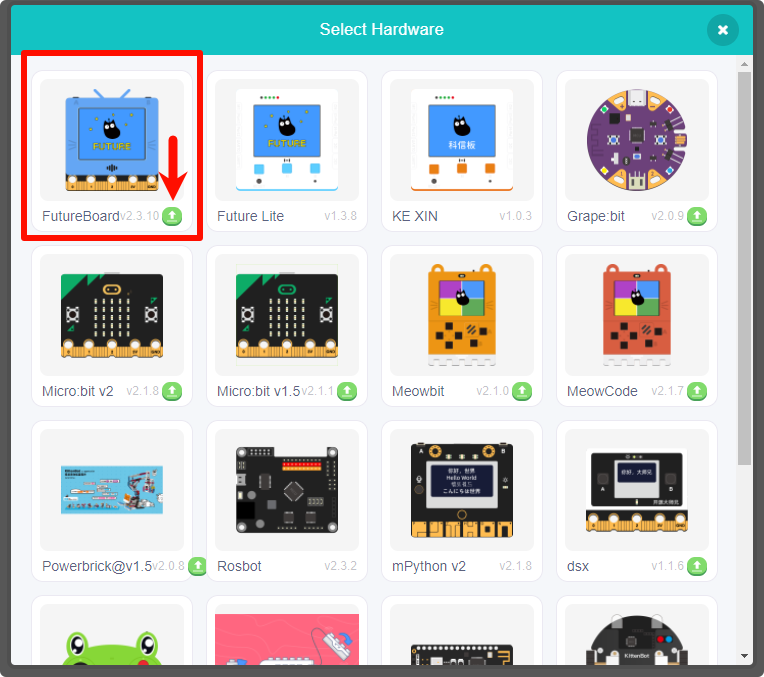
| Compatible Mainboard | Future Board、Micro:bit |
Hardware Connection Diagram
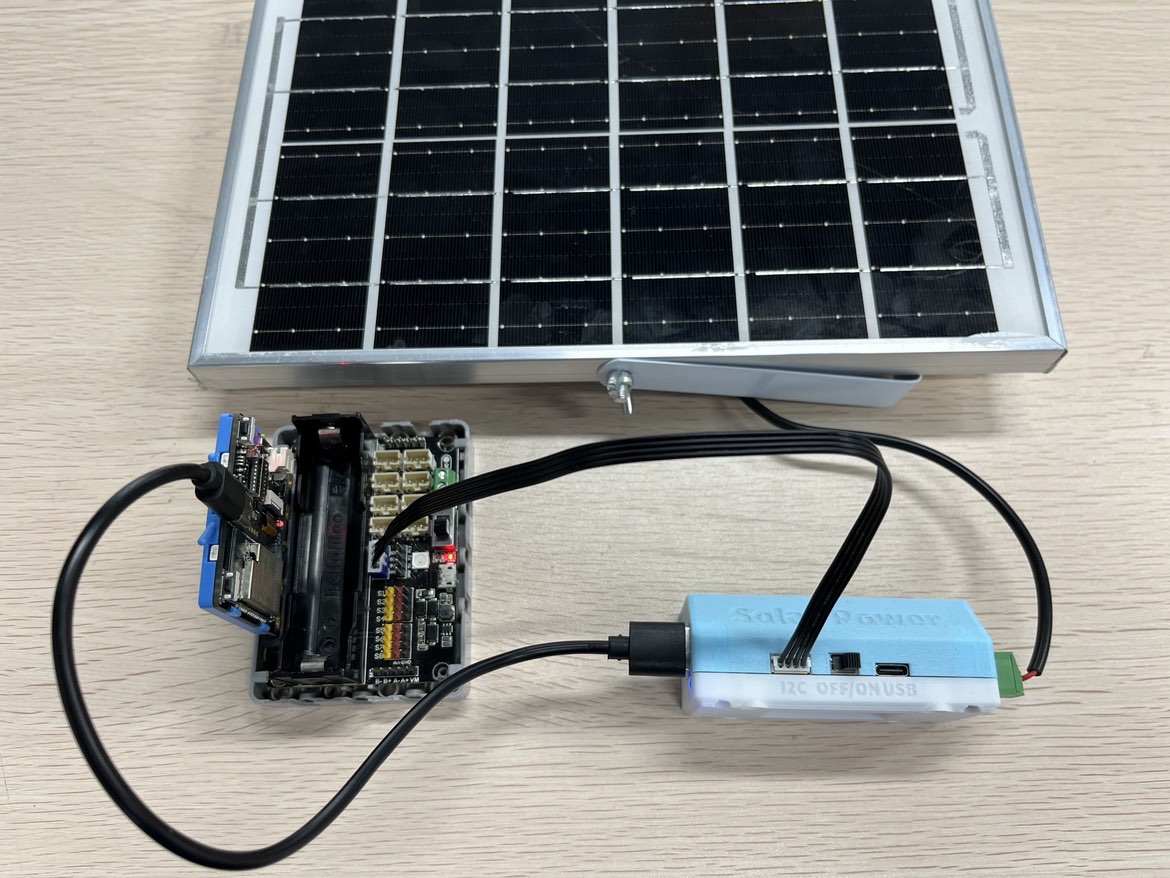
Physical Connection
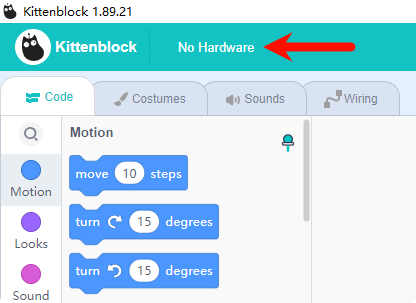
Guide for Use in Kittenblock
Note: Before selecting the hardware, ensure that the hardware mainboard is updated to the latest version (i.e., there is no small arrow for update in the lower right corner).
Program Package
Future Board
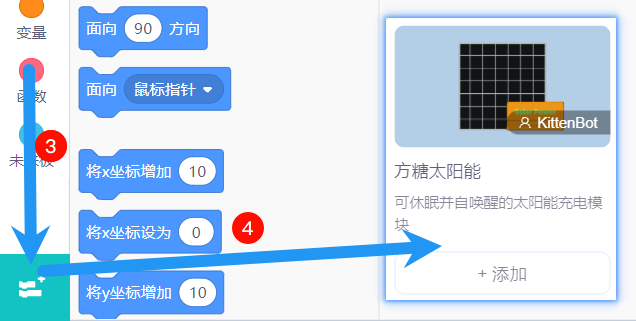
After selecting the hardware Future Board, add the hardware sub-plugin Sugar Solar.
积木介绍
 | Set the solar module output status, which is enabled by default |
|---|---|
 | Get battery voltage |
 | Get time |
 | Set time |
 | Sleep the module and set the wake-up time |
Case
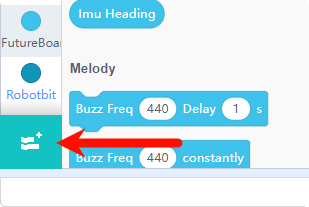
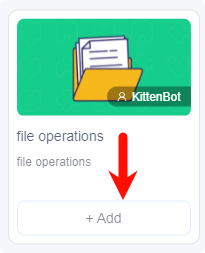
- add the file management plugin.
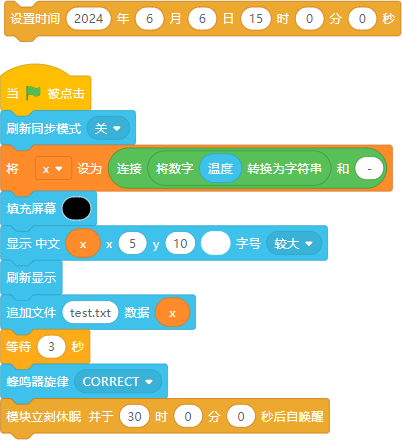
- After connecting the hardware and setting the correct time, click on this brick to adjust the time.

- Upload the program to get the temperature every half hour, save it to the text, and then go into sleep mode to extend the endurance.
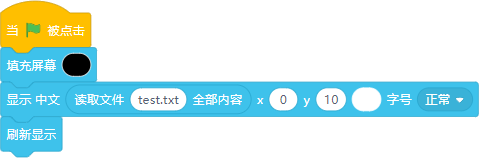
- Read the Saved Data
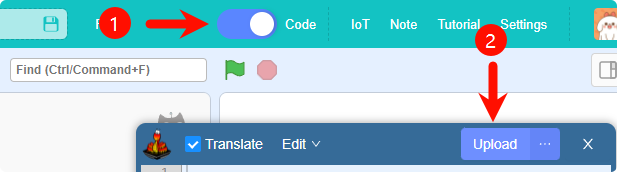
Upload the Program
Make sure you have written the program according to the instructions above, click the code switch button in the upper left corner of the software, and click the upload button in the pop-up code box.
If you are not clear about the concepts of program upload and online running, first check the "Quick Start Guide for Future Board Programming."